SKYJO Action strategy
SKYJO Action Strategy: Better Turns, Smarter Stars, and Safer Finishes
Win more useful turns by comparing the points you can remove now with the time your next plan needs. These practical examples explain when to take a discard, spend an action, use a star, and close a round.
Start with the costs that change every decision
The strongest SKYJO Action strategy begins with a simple question: what does this move buy before the round ends? A lower number, a completed match, useful information, and an action card are different kinds of progress. They cannot all be collected on the same ordinary turn. Treating an action card as a free extra is one of the easiest ways to build an attractive position that scores badly.
Under the publisher's printed Action rules, your ordinary choice is to draw a playing card, take an action card, or play or discard an action card. A newly acquired action normally waits until a later turn. An action still beside your layout at scoring costs 10 points. Individual card effects can grant additional moves, but there is no general free action phase around every playing-card draw.
Think of taking an action as making an appointment with your future self. You spend this turn collecting it, and you need a later opportunity to turn it into something useful. Three appealing actions waiting beside a low layout represent 30 points of exposure. The problem is especially sharp when another player can finish soon: a clever future sequence has no value if the sequence never gets a turn.
Before committing, compare three things. First, identify a concrete benefit available now: a known replacement, a legal match, or a useful effect you already own. Next, identify how many personal turns your alternative needs. Finally, check who can close the round before you finish it. This is a practical planning method, rather than a claim that every position has a calculable best move.
Also separate the cards' printed numbers from their role in a plan. An 8 may be a liability by itself and valuable beside two other 8s. Conversely, making a complete numbered match can force you to remove negative cards you would prefer to keep. A matching pattern is therefore a means to lower your eventual total, not a goal worth pursuing at any price. If you are coming from the original game, the SKYJO edition comparison helps establish the boundary. The advice here concerns the physical Action game with separate playing and action decks.
Choose between a certain improvement and a speculative plan
Your first comparison should be between a result you can describe now and a result that needs something else to happen. That distinction is more useful than declaring that every card below a particular number is good. The same 2 can be an excellent replacement, an unnecessary interruption to a nearly completed match, or a poor exchange for a hidden negative card.
Take a useful discard for a reason you can name
Suppose you have a visible 10 and the discard is a 2. Replacing the 10 removes eight known points. Taking that same 2 for a hidden position establishes a low number there, but the size of the improvement is unknown. If the displaced card is negative, the exchange actually makes the total worse. Neither choice is automatically correct: the visible replacement offers certainty, while the hidden replacement removes uncertainty and advances the round's clock.
Now suppose a different column contains two visible 7s and a hidden card. Keeping that pair is a bet on completing a match, not a discount already earned. Those two cards still contribute 14 until the plan works. When there is time, the potential clear can justify leaving them alone. When an opponent is nearly finished, accepting a reliable reduction elsewhere becomes more attractive. Do not count a planned clearance in your score before it exists.
The playing-card branch has a useful asymmetry: a taken discard must be exchanged, while an unwanted blind draw can be rejected in exchange for revealing a hidden card. Choose the discard when you can name its job. If the only explanation is that the number looks pleasant, pause and compare the blind draw's flexibility. Also look at the card you will leave for the next player. Helping them complete an expensive match can outweigh a small improvement to your own display.
Reveal information when it can still change your next turn
Revealing an ordinary numbered card does not itself reduce its points. Its benefit is making the next replacement, matching decision, or finishing calculation better informed. That benefit needs time. Learning about a high card while you still expect several turns is different from discovering it after an opponent has already started the final sequence.
If you reject a blind draw, choose the required reveal with a question in mind. A card beside a pair may establish whether the match needs one replacement. A card in a different line may show where your biggest remaining liability lies. Keeping several cards hidden solely because a guide recommends a particular number of hidden positions is weak planning. Preserve a hidden position when it serves timing; expose it when information can change what you do next. In both cases, remember that your opponents' progress can remove that future choice.
Use stars to finish a plan before starting another
Stars create several possible benefits, and that is precisely why they can distract you. Magilano's Action description identifies their two matching roles: helping numbered sets and forming valuable star sets. You still need to choose a job for the star in the position you actually have.
Clear expensive matches instead of protecting an imagined bonus
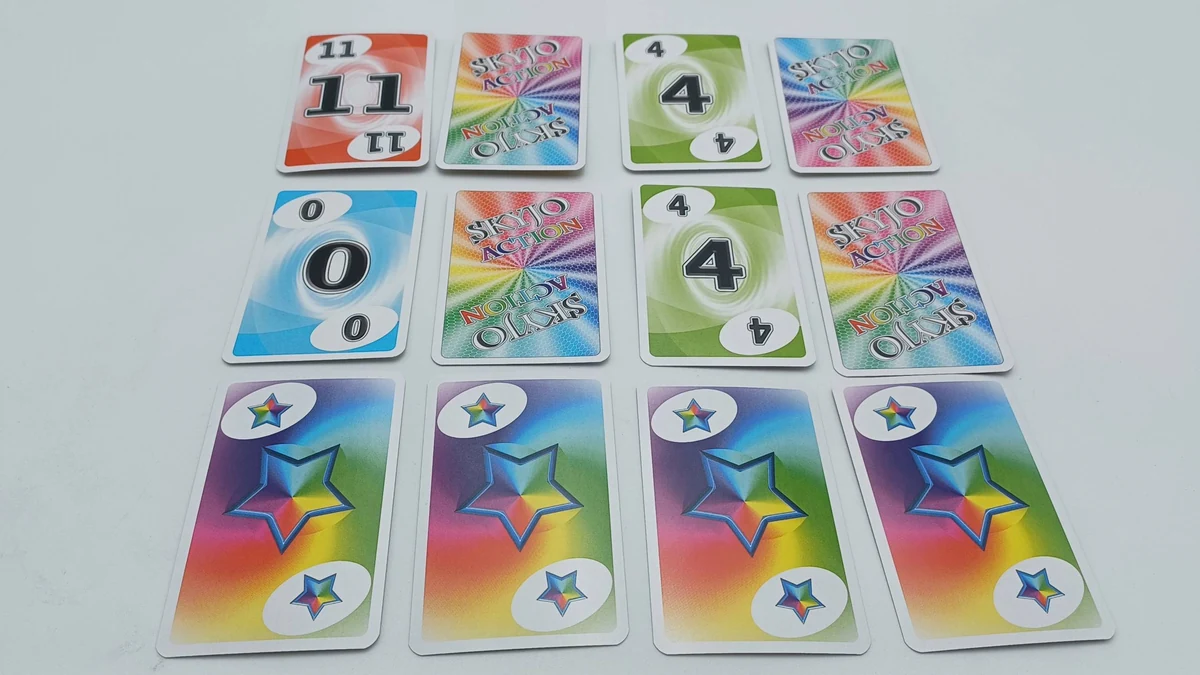
Consider a complete vertical line showing 8, 8, and a star. Using the star as an 8 clears the line and removes 16 numbered points. Keeping the star unconverted preserves a possible future project, but it leaves those two 8s in your score. If the round is moving quickly, the immediate clear can be much more useful than hoping to collect two additional stars and arrange them later.
That comparison changes when the numbers are small. Clearing two 1s sacrifices the star for only two points of reduction. With plenty of time and a plausible way to collect a star set, keeping flexibility may be attractive. These are different positions, so “always save stars” and “always clear with stars” both fail. Compare the points removed now, the extra work needed later, and the chance that another player takes away the remaining time.
Decline an action card when the free reward creates a liability
A star's eligible activation offers a one-time right to take an action card; it does not oblige you to accept one. That right expires that turn, and moving the same star around with swaps does not generate a fresh reward. Treat the choice as part of your current plan. A card obtained without spending an ordinary acquisition turn can still cost a future turn to use and can still be a scoring liability.
Suppose another player has one hidden position left, while your own next useful move is a known replacement. Accepting an action you cannot profitably use soon creates a conflict for your next turn. Declining it can preserve the clean replacement plan. Earlier in a slow round, the same card may be worth taking because you expect time to deploy it. “Free to acquire” describes the acquisition cost, not the final value.
Keep a star bonus only when the layout can support it
A retained complete line of three stars scores −10; a complete four-star row scores −15. Unlike complete numbered matches, a pure star line need not be discarded. A star cannot be counted in two intersecting bonus lines. Keep the geometry honest: three isolated stars are not automatically a bonus, and a line too short to qualify does not earn one.
Once you already have a valid three-star bonus, expanding the project to a four-star bonus improves that component by five points, not fifteen. Spending several turns or leaving a large numbered liability to chase those five can be poor business. On the other hand, an established star line with few remaining liabilities can be a reason to shorten the round rather than keep searching. Value the bonus you hold, then ask what the next step adds.
Buy action cards with time, then spend them with purpose
The face-up action display offers a useful advantage: you can choose a known tool rather than hope a blind action draw suits the position. Use that knowledge. Before spending a turn to take a card, identify the intended target and the move it replaces. A vague intention to “do something powerful later” is less persuasive than a swap that completes a visible match.
Acquisition and execution are separate decisions. A card worth taking early can become a poor card to hold late. Reassess after every opponent's turn, especially when someone removes a line or reveals another hidden position. If the original plan has disappeared, using the card for smaller value or spending an ordinary turn to discard it may be the practical way to avoid its penalty. You do not recover the acquisition turn by defending a plan that no longer fits.
Choose an effect for the position, not a permanent tier list
For a concrete own-swap example, imagine a complete column of 6, 6, and 1, with another visible 6 elsewhere in your layout. Swapping that outside 6 with the 1 creates a complete column of three 6s, removing 18 numbered points while relocating the 1. Provided other face-down cards remain, this can improve your score without automatically finishing the round. A self-swap has a precise job here; it need not wait for a higher prestige action to appear.
Enlightenment offers a different kind of value. It lets you inspect a complete row or column's hidden cards in your own or another player's layout. It becomes useful when that knowledge will change a subsequent replacement, swap, or decision about closing. If there will probably be no later decision, the information has little time to pay back the turn spent obtaining it. Identify the question before looking, rather than inspect a line merely because several cards are hidden there.
Double Move permits two consecutive moves. Its practical advantage is doing two useful things before another player intervenes. Name those tasks before playing it: reducing a known liability and then resolving a second problem can be a plan; hoping that two draws will somehow fix everything is still a gamble. If a first move could trigger the round's end, do not assume an extra move automatically overrides the ending rules. Plan the order with that boundary in mind.
Defense, called “Defence” in the official Action booklet, automatically blocks one attack while held beside your layout. It is then discarded. You may instead play it to remove that protection and receive an additional move. Keeping it is sensible when a visible attack threatens a valuable position; playing it becomes attractive when the round is closing and the extra move matters more than insurance. It is neither permanent protection nor a card you can casually unload after final turns begin.
These examples suggest a better habit than memorizing a universal ranking: describe the effect, the intended target, and the remaining time. A modest effect that completes today's plan can outperform a dramatic one whose value depends on several more turns.
End the round only after counting the whole position
Closing is a commitment to the final comparison, not a reward for revealing quickly. Add the actual remaining layout, any valid retained star bonus, and every unused action. Then consider what the other players can still change. Their current visible totals are clues, not the final answer.
For example, suppose your final layout totals 9 after all eligible matches and bonuses, and one unused action remains beside it. Your round total before any penalty is 19. If you triggered the ending and another player finishes on 14, your recorded score is 38, not 9. The action card did more than add ten: its cost helped put your total into a losing comparison that doubled the whole positive round score.
A useful finish calculation
Remaining numbered total + valid star-set scoring + unused action penalties = round total before the ender's penalty. Compare that result after every other player's final move and final reveals.
A positive tie is also dangerous. If your total is 14 and another player finishes on 14, triggering the ending makes your 14 become 28. You need to be strictly lower to avoid that positive-score penalty. Zero and negative round totals are exempt from doubling; finishing on a negative total does not make it twice as favorable. These exceptions matter when stars or negative numbers bring the display below zero.
Track who actually causes the trigger. An action can reveal the last hidden card in somebody else's layout. The actor who ended the round bears the score comparison; it does not automatically belong to the owner of the newly completed layout. That makes a finishing attack potentially dangerous when you are behind, even if the attacked player seems unable to improve their cards.
Most critically, the final sequence is not a cleanup window for unused actions: they cannot be played or discarded then. Other players receive their final move, while the player who caused the trigger does not get another one. If your plan requires using an action, it should normally happen before that boundary. Holding it until “my last turn” is a promise the rules may not let you keep.
You cannot eliminate uncertainty from a close when other players still have hidden cards. Instead, inspect their plausible immediate improvements: a visible high card that could be replaced, a nearly completed match, or a star line already contributing a bonus. A modest visible lead can vanish after one change. Conversely, delaying with a stable low total gives opponents time to improve and can leave your own useful actions exposed. The finishing decision is a comparison of those concrete risks, rather than a universal minimum lead.
Adapt the plan to the table and keep a short turn checklist
In a duel, the card you discard is immediately available to your only opponent. That makes a small improvement less attractive when it hands them an obvious large clear. Their action collection is also easier to follow because there is only one opponent to watch. For deeper examples of that exchange, use the two-player SKYJO Action guide.
With more players, several layouts and the central action display can change before your next turn. A plan that depends on a particular visible option surviving becomes less dependable. Watch every plausible closer, rather than only the player with the smallest visible sum. This does not establish that larger games always finish faster: it means your forecast must account for more decisions made outside your control.
Agree the setup before using advice about remaining turns. The standard layout has twelve cards. For seven or eight players, the booklet's increased-player variation reduces each layout to nine cards in a three-by-three grid, with one initial reveal. That changes the initial distance to finishing and the available matching geometry. Do not silently carry expectations about a twelve-card layout into that shorter setup.
The cumulative score also changes what a successful round looks like. The game ends when someone reaches at least 100 points, and the lowest cumulative total wins. If you lead comfortably, a reliable modest score may protect your position better than a prolonged hunt for an impressive star bonus. If you trail badly and the game may end this round, accepting a more uncertain matching project can be reasonable. Risk makes sense when it serves the standings, rather than simply making the turn exciting.
- What known point reduction or completed match can I take immediately?
- Which hidden information would change a later decision, and is there time to use it?
- How many unused actions am I carrying, and which one has a concrete job?
- Who could trigger the final sequence before my next useful move?
- If I close, does my full total still look sound after the others' final moves?
For your next game, practice naming one purpose for every action you take. “This swap clears eighteen points” is a plan you can evaluate afterward. “This card is powerful” is not enough to explain whether collecting it was worth the time. The general SKYJO strategy page provides broader classic-game background; keep the Action timing, star choices, and unused-card costs in this guide attached to every decision you make in this edition.

Loading comments...